This project was my first foray into the entire process of surgical illustration, and I loved every moment of it! I chose to illustrate an open parathyroidectomy due to the structure’s superficial proximity, and witnessed two surgical approaches from two different surgeons. The procedure involves removing one or more parathyroid glands from each patient (there are usually four). By removing glands, the elevated parathyroid hormone level will ideally fall into a safe range.
The first step: obtaining accurate OR sketches.
I was extremely lucky: as we were waiting for PTH levels to come back from Pathology the surgeon asked me to run through my steps and corrected as I went, which helped clarify a lot.
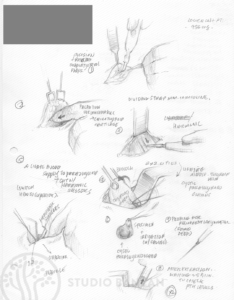
Figure 1 is showing the initial incision site and the recurrent laryngeal nerve (in yellow), which is an important surgical landmark to preserve while dissecting, as it is extremely close in location to the parathyroid glands. Figure 2 shows dissection of the strap musculature.
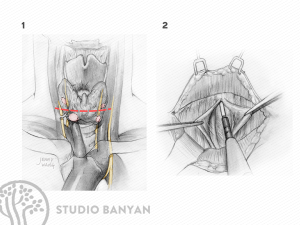
Figure 3 is showing the retraction of the strap musculature and the locations of the right inferior and superior parathyroid glands. Figure 4 shows the medial rotation of the thyroid gland and the dissection of the middle thyroid vein to increase surgical access.
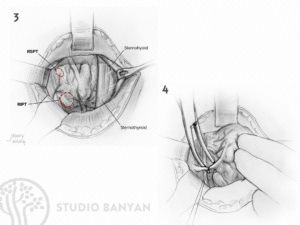
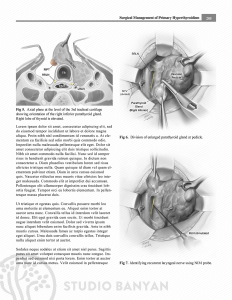
Figure 5, 6 and 7 show the division of the vascular pedicle and the removal of the parathyroid gland. (Figure 5 is an axial section which highlights structure relationships.) In figure 7, the recurrent laryngeal nerve is stimulated using a NIM probe.
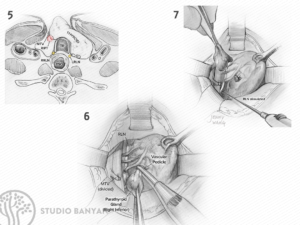
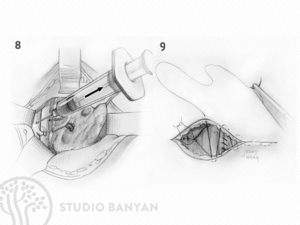
Figure 8 shows the retrieval of venous blood from the IJV or peripheral veins. Blood is drawn every 10 minutes to monitor falling PTH levels. Interestingly during one of the surgeries, a cyst ruptured on one of the parathyroid glands prior to removal, flooding the local area with PTH. It was quickly absorbed into surrounding tissue and the first blood draw revealed an astronomically high PTH level due to the rupture. It fell to the appropriate level after 50 minutes (with extra blood draws to confirm), and the surgeon then elected to close the incision (Figure 9).
After these sketches were approved, I then placed Figures 5, 6, and 7 into a journal format and rendered them in greyscale with spot color using Procreate and Adobe Photoshop.
And that’s the end. Thanks for reading!
